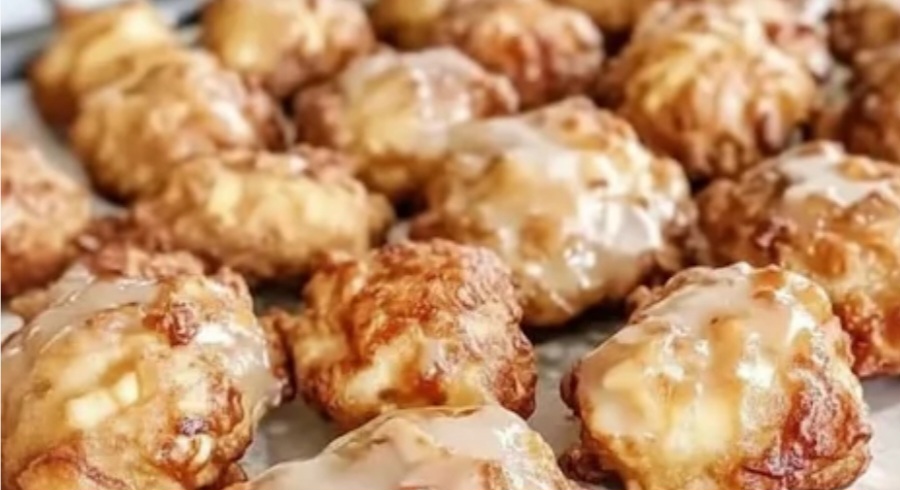
Stop everything. Close your eyes. Picture your favorite apple orchard, a crisp autumn day, and the smell of cinnamon sugar hanging in the air. Now imagine capturing all that warmth and spice into a soft, pillowy, melt-in-your-mouth baked doughnut bursting with juicy apple chunks, crowned with a sweet vanilla glaze.
This is not a dream—this is your new reality with these revolutionary Baked Apple Fritters.Let’s be honest: traditional apple fritters are glorious, but deep-frying is a messy, intimidating, and often greasy affair.
What if you could achieve that same craggy, tender, cake-like interior and golden-brown perfection without ever touching a pot of hot oil? What if you could have a healthier, easier, and utterly foolproof version that makes your entire home smell like a cider mill?This recipe is your answer. We’ve cracked the code.
By using a simple batter technique and the magic of a hot oven, we create light-as-air, impossibly soft fritters with caramelized edges and a fluffy center that will have everyone convinced they’re fried.
They’re ready in under 30 minutes, require zero special equipment, and deliver all the nostalgic comfort without any of the fuss.
Get ready to fall in love with apple fritters all over again.Why You’ll Abandon the Fryer ForeverThis baked method isn’t a compromise—it’s an upgrade. Here’s why:The Textural Triumph: Achieves the perfect cake-doughnut texture—crispy craggy tops, golden-brown bottoms, and a cloud-soft, apple-studded interior.
No-Fuss, No-Mess: One bowl, one spoon, one baking sheet. No thermometer, no splatter guards, no lingering fried smell.Healthier Indulgence: All the flavor, with significantly less fat. You control the quality of ingredients from start to finish.Speed & Consistency: Ready in half the time, with guaranteed perfect results every single batch. No more guessing on oil temperature.The Aroma Therapy: Your kitchen will smell like a professional bakery for hours.Gathering Your Ingredients: Simple Pantry MagicFor the Fritter Batter:
2 cups (250g) all-purpose flour – spooned and leveled⅓ cup (67g) granulated sugar2 ½ teaspoons baking powder – for maximum rise1 ½ teaspoons ground cinnamon – the soul of the flavor½ teaspoon ground nutmeg or apple pie spice½ teaspoon fine sea salt1 cup (240ml) whole milk or buttermilk – buttermilk adds tang and tenderness2 large eggs, at room temperature3 tablespoons unsalted butter, melted and cooled1 ½ teaspoons pure vanilla extractThe Star of the Show:2 medium apples (about 2 cups diced) – Granny Smith for tartness or Honeycrisp for sweetness, peeled and diced into ¼-inch pieces1 tablespoon lemon juice – to prevent browningFor the Vanilla Glaze:1 ½ cups (180g) confectioners’ sugar, sifted3-4 tablespoons whole milk or heavy cream1 teaspoon pure vanilla extractPinch of saltThe Foolproof, Step-by-Step Method to Baked PerfectionStep 1: Prepare the Apples & PreheatPreheat your oven to 425°F (220°C). This high heat is crucial for creating those beautiful, crispy tops.Line a large baking sheet with parchment paper and grease it lightly with butter or non-stick spray.Toss the diced apples with the lemon juice in a small bowl. Set aside.Step 2: Make the Batter (Do Not Overmix!)In a large mixing bowl, whisk together the dry ingredients: flour, sugar, baking powder, cinnamon, nutmeg, and salt.In a separate bowl or large measuring cup, whisk the wet ingredients: milk, eggs, melted butter, and vanilla until smooth.Create a well in the center of the dry ingredients. Pour the wet mixture into the well.Using a silicone spatula, gently fold the mixture together. Mix only until the flour is just moistened. The batter will be thick and lumpy—this is perfect! Overmixing creates tough fritters.Gently fold in the diced apples until just distributed.Step 3: Shape & Create the “Craggy” TopUsing a large cookie scoop (about ¼ cup), two spoons, or lightly oiled hands, drop mounds of batter onto the prepared baking sheet. Space them about 2 inches apart.DO NOT smooth the tops. We want those uneven, craggy peaks and valleys—they will brown beautifully and give us that authentic fritter texture.If desired, sprinkle the tops lightly with a mix of cinnamon and sugar before baking for extra crunch.Step 4: Bake to Golden-Brown GloryBake for 13-16 minutes, rotating the pan halfway through, until the fritters are puffed, golden brown on top and bottom, and a toothpick inserted into the center comes out clean.Let them cool on the baking sheet for 5 minutes before transferring to a wire rack set over a tray (for glazing).Step 5: The Simple Vanilla GlazeWhile the fritters cool slightly, make the glaze. In a medium bowl, whisk the sifted confectioners’ sugar, 3 tablespoons of milk/cream, vanilla, and salt until smooth. Add more liquid, one teaspoon at a time, until you reach a thick but pourable consistency.While the fritters are still warm (not hot), dip the top of each one into the glaze, letting the excess drip off. Return to the wire rack. The glaze will set slightly as they cool.Pro Baker’s Secrets for Ultimate FrittersThe Buttermilk Secret: Using buttermilk instead of regular milk creates a more tender crumb and subtle tang that perfectly balances the sweet glaze.Apple Prep is Key: Dice your apples small (¼-inch) so they soften perfectly during the quick bake. Larger chunks may remain too firm.The Double-Dip: For a thick, bakery-style glaze, let the first layer set for 5 minutes, then dip a second time.Add Some Crunch: After glazing, immediately sprinkle with toasted chopped pecans or walnuts for added texture.Serving, Storing & The “Next-Day” MiracleServing: Serve slightly warm for the ultimate experience. They are sublime with a hot cup of coffee, cold glass of milk, or as part of a brunch spread.Storing: Store completely cooled fritters in an airtight container at room temperature for up to 2 days.Reviving Leftovers: To restore that “just-baked” softness, warm a fritter in the microwave for 8-10 seconds.Freezing: Freeze unglazed, baked fritters on a sheet pan, then transfer to a freezer bag for up to 2 months. Thaw at room temperature and warm before glazing.Conclusion: The Fritter Revolution Starts in Your OvenThis recipe changes everything. It proves you don’t need a fryer to achieve doughnut shop quality. It gives you the freedom to enjoy a warm, spiced, apple-filled treat any morning of the week with minimal cleanup and maximum joy.So preheat that oven, dice those apples, and embrace the simple magic of baking. Your home is about to smell incredible, and you’re about to taste the best apple fritter of your life—straight from your own oven.We have to know—are you Team Tart Granny Smith or Team Sweet Honeycrisp for your apple fritters? What’s your favorite way to enjoy a warm doughnut? Share your thoughts and photos in the comments below!