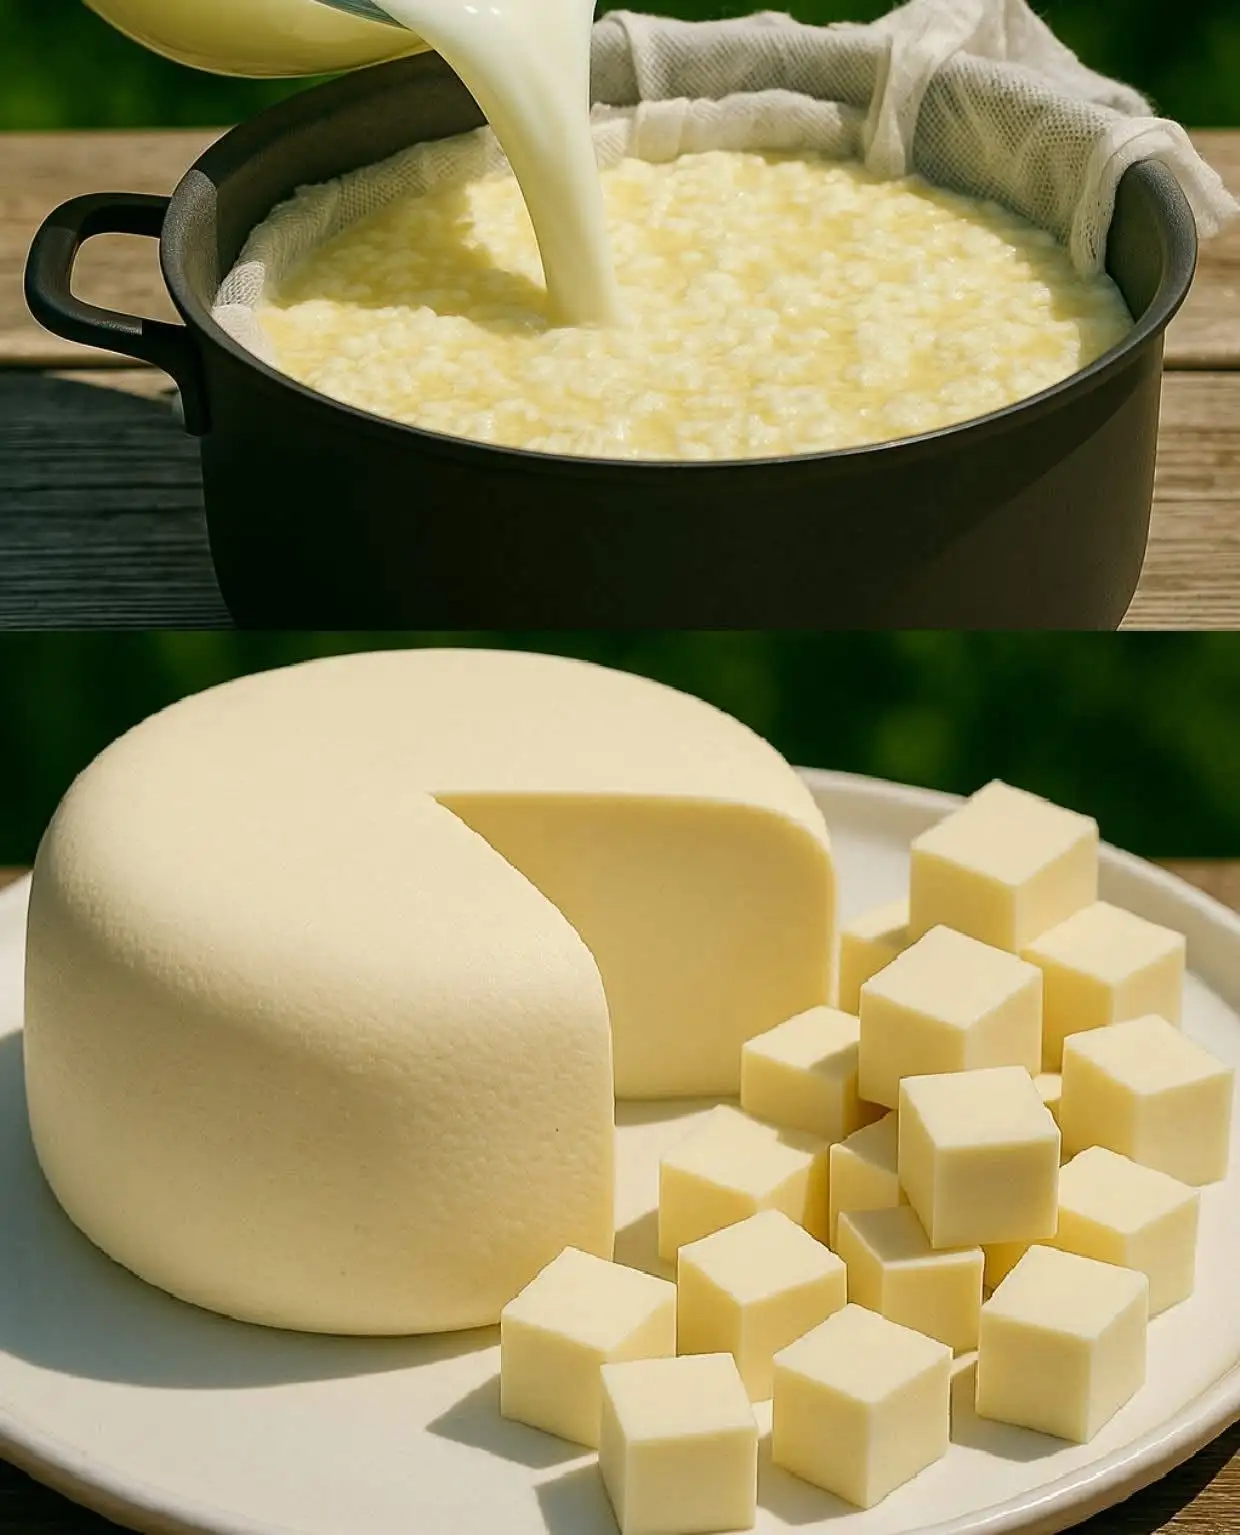
This Homemade Fresh Cheese Recipe is a simple, creamy, and delicious cheese made with milk, an acid such as lemon juice or vinegar, and a little salt. It is soft, fresh, mild, and perfect for slicing, crumbling, cubing, or adding to many homemade dishes.
The texture is smooth and tender.
The flavor is mild and milky.
The method is simple and beginner-friendly.
The final cheese can be served fresh, pan-fried, added to salads, used in sandwiches, or enjoyed with bread and herbs.
This recipe is perfect if you want to make an easy homemade cheese without complicated equipment, special cultures, or aging. It is similar to farmer’s cheese, paneer, queso fresco, or fresh curd cheese, depending on how you press and season it.
Serve this Homemade Fresh Cheese with warm bread, olive oil, tomatoes, cucumbers, eggs, pasta, rice bowls, roasted vegetables, or as a simple snack with honey and nuts.
Homemade Fresh Cheese Recipe Overview
| Detail | Information |
|---|---|
| Recipe Name | Homemade Fresh Cheese |
| Prep Time | 10 minutes |
| Cook Time | 15 minutes |
| Draining Time | 1–3 hours |
| Total Time | About 2–4 hours |
| Servings | 8–10 |
| Course | Cheese, Breakfast, Snack, Side Dish |
| Cuisine | Homemade / Fresh Cheese |
| Difficulty | Easy |
| Best Served | Fresh, chilled, sliced, or cubed |
Why You’ll Love This Homemade Fresh Cheese Recipe
This Homemade Fresh Cheese Recipe is simple, affordable, and very satisfying to make at home.
You only need a few ingredients.
You do not need a cheese press.
You do not need special starter culture.
You do not need complicated aging.
You do not need professional equipment.
The process is easy. Milk is heated, curdled with lemon juice or vinegar, strained through cheesecloth, pressed gently, and chilled until firm.
The result is a soft fresh cheese that can be sliced or cubed, just like the cheese shown in the image.
This cheese is also very versatile. You can keep it plain and mild, or you can season it with herbs, garlic, pepper, chili flakes, or olive oil.
It works for breakfast, lunch, dinner, snacks, and appetizers.
It is especially delicious when served fresh with bread, tomatoes, olives, or salad.
What Is Homemade Fresh Cheese?
Homemade fresh cheese is a simple cheese made by separating milk into curds and whey.
The curds are the solid part.
The whey is the liquid part.
When milk is heated and mixed with an acid such as lemon juice or vinegar, it separates naturally. The curds are then drained and pressed into a soft cheese.
This type of cheese is fresh, meaning it is not aged.
It has a mild flavor and a soft texture.
Depending on how long you drain and press it, it can be creamy and spreadable or firm enough to slice into cubes.
This recipe gives you a firm fresh cheese that can be sliced or cubed after chilling.
Ingredients
Main Ingredients
| Ingredient | Amount |
|---|---|
| Whole milk | 1 gallon / 4 liters |
| Lemon juice or white vinegar | ¼ cup |
| Salt | 1–1 ½ teaspoons |
| Heavy cream, optional | ½ cup |
| Fresh herbs, optional | 1–2 tablespoons |
Optional Flavor Add-Ins
| Add-In | Why It Works |
|---|---|
| Chopped parsley | Adds freshness |
| Chives | Adds mild onion flavor |
| Garlic powder | Adds savory flavor |
| Black pepper | Adds warmth |
| Chili flakes | Adds spice |
| Dried oregano | Adds Mediterranean flavor |
| Dill | Adds fresh herb flavor |
| Olive oil | Adds richness |
| Lemon zest | Adds brightness |
| Honey | Good for serving |
Ingredient Notes
Milk
Whole milk gives the best homemade cheese.
It creates a richer flavor and a softer, creamier texture.
For the best result, use pasteurized whole milk.
Avoid ultra-pasteurized milk if possible because it may not curdle as well.
The higher the fat content, the creamier the cheese will be.
Low-fat milk can work, but the cheese may be drier and less rich.
Lemon Juice or Vinegar
Lemon juice and vinegar help curdle the milk.
Lemon juice gives a lighter, fresher flavor.
White vinegar gives a cleaner and stronger curdling effect.
Apple cider vinegar can work, but it may add a slight flavor.
Add the acid slowly and stir gently.
If the milk does not separate fully, add a little more lemon juice or vinegar one tablespoon at a time.
Salt
Salt adds flavor.
Fresh cheese without salt can taste bland.
Start with 1 teaspoon, then adjust to taste.
If you want a very mild cheese, use less salt.
If you want it for salads or savory meals, use a little more.
Heavy Cream
Heavy cream is optional.
Adding cream makes the cheese richer, smoother, and more tender.
It is useful if you want a softer cheese with a creamy texture.
Skip it if you want a firmer, lighter cheese.
Herbs
Fresh herbs can be mixed into the curds before pressing.
Parsley, dill, chives, basil, and oregano all work well.
Make sure herbs are finely chopped.
Do not add too much liquid seasoning because it can affect the texture.
Equipment Needed
| Equipment | Purpose |
|---|---|
| Large pot | For heating milk |
| Wooden spoon | For stirring |
| Thermometer, optional | For accurate heating |
| Cheesecloth or clean kitchen cloth | For straining |
| Strainer or colander | Holds the cloth |
| Large bowl | Catches the whey |
| Small round bowl or mold | Shapes the cheese |
| Plate or weight | Presses the cheese |
| Knife | For slicing |
You can use a cheese mold if you have one, but it is not required.
A small bowl lined with cheesecloth works very well.
A clean kitchen towel can also work if it is thin enough for draining.
Step-by-Step Instructions
Step 1: Prepare Your Equipment
Before heating the milk, prepare your strainer.
Place a large strainer or colander over a deep bowl.
Line it with cheesecloth or a clean thin kitchen towel.
Make sure the cloth is large enough to fold over the curds later.
Clean equipment is important because this is a fresh dairy recipe.
Step 2: Heat the Milk
Pour the milk into a large pot.
Place it over medium heat.
Stir occasionally so the milk does not burn on the bottom.
Heat the milk until it is hot and steaming, about 185°F / 85°C if using a thermometer.
Do not let the milk boil hard.
A gentle heat gives better curds and a smoother cheese.
Step 3: Add the Lemon Juice or Vinegar
Turn the heat to low.
Add the lemon juice or vinegar slowly.
Stir gently for a few seconds.
Then stop stirring and let the milk sit for 5–10 minutes.
The milk should begin to separate into white curds and yellowish whey.
If the liquid still looks milky, add 1 more tablespoon of lemon juice or vinegar and wait a few more minutes.
Step 4: Let the Curds Set
Once the curds form, turn off the heat.
Let the pot sit undisturbed for another 5 minutes.
This helps the curds become firmer and easier to strain.
Do not stir too much at this stage.
Gentle handling gives a smoother cheese texture.
Step 5: Strain the Curds
Carefully pour the curds and whey into the lined strainer.
Let the liquid drain into the bowl underneath.
Be careful because the mixture will be hot.
Let it drain for about 10–15 minutes.
The longer it drains, the firmer the cheese becomes.
Step 6: Season the Curds
Transfer the drained curds to a bowl or keep them inside the cloth.
Add salt.
Mix gently.
If using herbs, garlic, pepper, or chili flakes, add them now.
Taste a small amount and adjust seasoning if needed.
Remember that the flavor becomes slightly milder after chilling.
Step 7: Shape the Cheese
Gather the cheesecloth around the curds.
Twist gently to remove extra whey.
Place the wrapped curds into a round bowl, small mold, or strainer.
Press the top lightly to shape it.
For a softer cheese, press gently.
For a firmer cheese, place a small plate and a light weight on top.
Step 8: Press the Cheese
Let the cheese press for 1–3 hours.
For soft fresh cheese, 1 hour is enough.
For sliceable cheese, press for 2–3 hours.
For firmer cubes, press longer and chill well before cutting.
Do not press too hard at the beginning, or the cheese may become dry and crumbly.
Step 9: Chill the Cheese
After pressing, remove the cheese from the cloth.
Place it on a plate or in an airtight container.
Refrigerate for at least 1 hour before slicing.
Chilling helps the cheese firm up.
This makes it easier to cut into clean slices or cubes.
Step 10: Slice and Serve
Use a sharp knife to slice or cube the cheese.
Serve it cold, room temperature, or lightly pan-fried.
You can drizzle it with olive oil, sprinkle it with herbs, or serve it with bread and vegetables.
How to Make Firm Cheese Cubes
To make firm cheese cubes like the image, drain and press the cheese longer.
Use less cream or skip the cream.
Press the cheese for 3 hours.
Chill it for several hours before cutting.
Use a sharp knife.
Cut into cubes only after the cheese is fully cold.
If the cheese is too soft, wrap it again and press it longer.
How to Make Soft Spreadable Fresh Cheese
For a softer version, drain the curds for less time.
Do not press heavily.
Add a little cream while mixing the curds.
Use less pressure and chill for a shorter time.
This version is great for spreading on toast, crackers, or warm bread.
You can mix it with herbs, garlic, lemon zest, or honey.
How to Use the Leftover Whey
Do not throw away the whey immediately.
Whey can be used in many kitchen recipes.
Use it in:
- Bread dough
- Pancakes
- Soup broth
- Smoothies
- Oatmeal
- Rice cooking water
- Pizza dough
- Biscuits
- Marinades
Whey has a mild tangy flavor and can add softness to bread and pancakes.
Store whey in the refrigerator for up to 3 days.
Flavor Variations
Garlic Herb Fresh Cheese
Add garlic powder, parsley, chives, and black pepper.
This version is perfect with toast, salads, and roasted vegetables.
Spicy Fresh Cheese
Add chili flakes, smoked paprika, and black pepper.
This version tastes great in wraps, sandwiches, and rice bowls.
Mediterranean Fresh Cheese
Add oregano, basil, parsley, and olive oil.
Serve with tomatoes, cucumbers, olives, and warm bread.
Lemon Dill Fresh Cheese
Add lemon zest and fresh dill.
This version is fresh, bright, and delicious with fish or cucumber salad.
Honey Walnut Fresh Cheese
Keep the cheese plain.
Serve with honey and chopped walnuts.
This version is perfect for breakfast or dessert-style snacks.
Black Pepper Cheese
Add cracked black pepper to the curds.
This gives the cheese a simple savory flavor.
Serve with bread and olive oil.
Best Ways to Serve Homemade Fresh Cheese
This cheese is very flexible.
Serve it with:
- Warm bread
- Crackers
- Olive oil
- Tomatoes
- Cucumbers
- Olives
- Fresh herbs
- Honey
- Jam
- Roasted vegetables
- Pasta
- Rice bowls
- Eggs
- Salads
- Sandwiches
- Wraps
For breakfast, serve it with bread, honey, and tea.
For lunch, serve it in a salad or sandwich.
For dinner, cube it and add it to pasta or roasted vegetables.
For snacks, serve it with crackers and olive oil.
Pan-Fried Fresh Cheese
Firm fresh cheese can be pan-fried.
Cut the cheese into thick slices or cubes.
Pat dry with paper towels.
Heat a little olive oil in a nonstick skillet.
Cook the cheese for 1–2 minutes per side until golden.
Serve hot with herbs, lemon juice, or honey.
This works best with firmer cheese that has been pressed well.
Homemade Cheese Salad Idea
Cube the fresh cheese and add it to a salad.
Use:
- Cucumber
- Tomato
- Red onion
- Fresh parsley
- Olive oil
- Lemon juice
- Black pepper
- Homemade cheese cubes
This makes a simple, fresh, and satisfying salad.
It is perfect for summer meals or light lunches.
Homemade Cheese Breakfast Plate
Serve slices of fresh cheese with:
- Boiled eggs
- Warm bread
- Olives
- Tomatoes
- Cucumbers
- Honey
- Jam
- Mint tea
This makes a simple and beautiful homemade breakfast.
The mild cheese works with both sweet and savory toppings.
Pro Tips for the Best Homemade Fresh Cheese
Use whole milk for the best texture.
Avoid ultra-pasteurized milk if possible.
Heat the milk gently.
Do not boil hard.
Add lemon juice or vinegar slowly.
Let the curds rest before straining.
Do not over-stir after curdling.
Drain longer for firmer cheese.
Press gently for a smooth texture.
Chill before slicing.
Season while the curds are still warm.
Use clean equipment.
How to Know If the Milk Has Curled Properly
The milk is properly curdled when you see white curds floating in yellowish liquid.
The liquid should not look fully white anymore.
If the mixture still looks like milk, it needs more acid or more resting time.
Add lemon juice or vinegar one tablespoon at a time.
Wait a few minutes after each addition.
Do not add too much acid at once because it can make the cheese taste sour.
How to Make the Cheese Less Sour
Use vinegar instead of too much lemon juice.
Add the acid gradually.
Stop adding acid once the milk separates.
Drain the curds well.
Rinse the curds briefly with cool water if the flavor is too sharp.
Add salt and a little cream to soften the flavor.
The goal is mild, fresh, and milky cheese, not sour cheese.
How to Make the Cheese Creamier
Use whole milk.
Add heavy cream to the milk before heating.
Do not overcook the curds.
Do not press too heavily.
Mix in a spoonful of cream after draining.
Drain for less time.
Creamier cheese is softer and better for spreading.
Firmer cheese is better for slicing and cubing.
Common Mistakes to Avoid
Using Ultra-Pasteurized Milk
Ultra-pasteurized milk may not curdle well.
Use regular pasteurized whole milk if possible.
Boiling the Milk Too Hard
Hard boiling can make the cheese rubbery.
Heat gently until hot and steaming.
Adding Too Much Acid
Too much lemon juice or vinegar can make the cheese sour.
Add slowly and only as much as needed.
Not Draining Long Enough
Short draining makes soft cheese.
If you want cubes, drain and press longer.
Pressing Too Hard Too Quickly
Heavy pressure can make cheese dry.
Press gently and gradually.
Cutting Before Chilling
Warm cheese is too soft to slice cleanly.
Chill before cutting.
Storage
Store homemade fresh cheese in an airtight container in the refrigerator.
Use within 3–5 days.
Because this is fresh cheese without preservatives, it should be kept cold.
Do not leave it at room temperature for long.
If it smells sour, bitter, or unpleasant, throw it away.
Freezing
Freezing is possible, but the texture may change.
Fresh cheese can become crumbly after thawing.
For best quality, eat it fresh.
If freezing, wrap tightly and freeze for up to 1 month.
Thaw in the refrigerator.
Use thawed cheese in cooked dishes rather than serving it plain.
Nutrition Estimate
| Serving | Amount |
|---|---|
| Calories | 120–220 |
| Protein | 8–14 g |
| Carbohydrates | 3–8 g |
| Fat | 7–16 g |
| Sodium | 180–350 mg |
| Serving Size | 1 slice or small portion |
Nutrition values are approximate and depend on milk type, cream, salt, and serving size.
Frequently Asked Questions
Can I make cheese with only milk and lemon juice?
Yes.
Milk and lemon juice are enough to make simple fresh cheese.
Salt is added for flavor.
Can I use vinegar instead of lemon juice?
Yes.
White vinegar works very well and gives reliable curds.
Why did my milk not curdle?
The milk may be ultra-pasteurized, not hot enough, or may need more acid.
Add more lemon juice or vinegar slowly.
Can I use low-fat milk?
Yes, but the cheese will be less creamy.
Whole milk gives better texture.
Do I need cheesecloth?
Cheesecloth is best, but a clean thin kitchen towel can also work.
How long should I press the cheese?
Press for 1 hour for soft cheese and 2–3 hours for firmer cheese.
Can I add herbs?
Yes.
Add herbs after draining and before pressing.
Can I fry this cheese?
Yes, if it is pressed firmly and chilled well.
Pan-fry slices or cubes in a little oil.
How long does homemade fresh cheese last?
It lasts about 3–5 days in the refrigerator.
Can I freeze it?
Yes, but the texture may become crumbly.
It is best enjoyed fresh.
Final Thoughts
This Homemade Fresh Cheese Recipe is soft, creamy, mild, and easy to make with only a few simple ingredients. Milk, lemon juice or vinegar, salt, and optional cream come together to create a fresh cheese that can be sliced, cubed, crumbled, or spread.
It is perfect for breakfast.
It is great for salads.
It works in sandwiches.
It can be served with honey or herbs.
It is simple enough for beginners and satisfying enough to make again and again.
Make it once, chill it well, slice it fresh, and enjoy a homemade cheese that tastes clean, creamy, and beautifully simple.