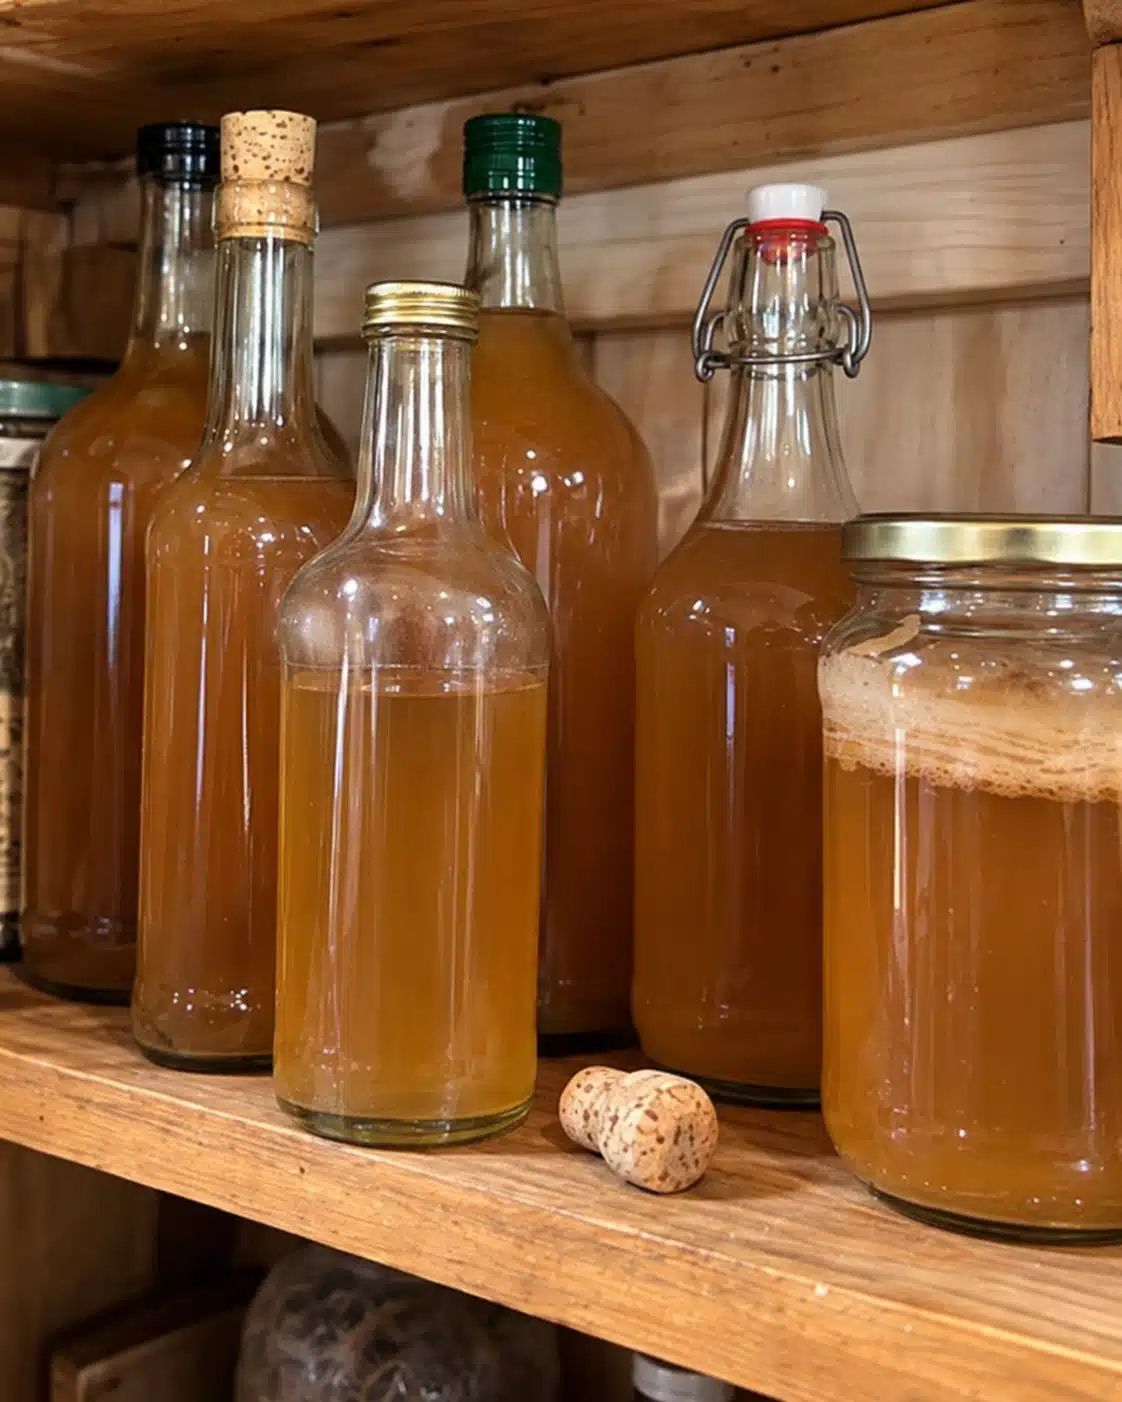
This Homemade Apple Cider Vinegar recipe is a traditional way to turn fresh apples, apple pieces, or clean apple scraps into a tangy fermented vinegar for salad dressings, marinades, sauces, and everyday kitchen use.
The process shown in the image begins with ripe apples that are washed and chopped before being placed in a large jar with water and sugar. Natural yeasts begin the first stage of fermentation, converting sugars into alcohol. After that, acetic-acid bacteria gradually transform the alcohol into vinegar when the liquid has access to oxygen.
Making apple vinegar at home is not difficult, but it does require patience. Unlike quick recipes that simply mix vinegar with apple juice, real fermented apple vinegar usually takes several weeks and sometimes longer depending on temperature, sugar level, microorganisms, and how sour you want the final result.
The result is a cloudy, amber-colored vinegar with a fruity aroma and pleasantly sharp flavor. It can be used in vinaigrettes, marinades, sauces, pickled-style refrigerator vegetables, and many other everyday recipes.
One important safety note: homemade vinegar does not have a guaranteed acidity level, so it should not be substituted for commercially standardized 5% vinegar in shelf-stable home canning recipes.
Recipe Overview
| Recipe Details | Information |
|---|---|
| Recipe Name | Homemade Apple Cider Vinegar |
| Focus Keyword | Homemade Apple Cider Vinegar |
| Prep Time | 20–30 minutes |
| First Fermentation | About 1–2 weeks |
| Vinegar Fermentation | About 3–6+ weeks |
| Total Time | Roughly 4–8 weeks |
| Difficulty | Easy, but requires patience |
| Main Ingredient | Fresh apples |
| Flavor | Fruity, tart, acidic |
| Method | Two-stage fermentation |
| Best For | Dressings, marinades, sauces |
| Make-Ahead | Required |
| Storage | Cool, dark place after finished |
| Canning Safe? | Not unless acidity is professionally verified |
Why Make Apple Cider Vinegar at Home?
One of the best reasons is reducing food waste.
Apples that are slightly bruised but still sound can often be used for fermentation after damaged areas are trimmed away. Clean peels and cores can also be used, although using plenty of actual apple flesh usually gives a richer flavor.
Homemade vinegar also develops a more complex aroma than plain distilled vinegar.
Depending on the apple variety, the finished liquid may taste slightly sweet, floral, fruity, or deeply tart.
It is also an interesting fermentation project because you can see the transformation happen gradually.
During the process, the liquid may bubble, become cloudy, develop sediment, and eventually take on the characteristic sharp smell of vinegar.
Ingredients
For a Large Jar
- 6–8 medium apples
- 6 cups filtered or non-chlorinated water
- 1/2 cup granulated sugar
- Additional water as needed
- Optional: 1/4 cup raw unfiltered apple cider vinegar containing live cultures
Optional Flavor Variations After Fermentation
- Cinnamon stick
- Fresh rosemary
- Fresh thyme
- Orange peel
- Lemon peel
- Ginger slices
- Whole peppercorns
For the first batch, keeping the fermentation simple is usually best.
Best Apples to Use
You can use almost any flavorful apple.
Sweeter varieties provide plenty of sugar for fermentation, while tart apples contribute more acidity and a sharper apple flavor.
Good choices include:
- Gala
- Fuji
- Honeycrisp
- Golden Delicious
- Pink Lady
- Granny Smith
- McIntosh
- Braeburn
Using a mixture of sweet and tart apples often creates the most balanced vinegar.
Very soft apples are not automatically unusable, but avoid fruit with visible mold, rot, or unpleasant odors.
Fermentation does not make spoiled fruit safe.
Whole Apples or Apple Scraps?
Both can work.
Whole apples generally produce a fuller fruit flavor because they contain more juice and fermentable sugar.
Apple scraps are economical and are useful after making pies, applesauce, crisps, or apple butter.
Clean scraps may include:
- Peels
- Cores
- Small pieces of flesh
Avoid adding heavily damaged or moldy pieces.
If using cores, remove any obviously spoiled material before fermenting.
Why Sugar Is Added
Sugar provides fuel for yeast.
During the first stage, yeasts consume sugar and produce alcohol.
The second stage uses bacteria that convert that alcohol into acetic acid, the compound responsible for vinegar’s characteristic sourness.
This means the sugar is not simply there to make the finished vinegar sweet.
Most of it is transformed during fermentation.
Too little fermentable sugar can slow the process, while excessive sugar can also create an unbalanced fermentation.
A moderate amount works best.
Why Water Quality Matters
Chlorinated water can sometimes interfere with fermentation microorganisms.
Filtered water is a good option.
If your tap water is heavily chlorinated, use filtered or bottled water instead.
You do not need mineral water or expensive specialty water.
The goal is simply clean water that does not strongly inhibit fermentation.
Equipment
| Equipment | Purpose |
|---|---|
| Large glass jar | Fermentation vessel |
| Cutting board | Preparing apples |
| Sharp knife | Chopping |
| Wooden spoon | Mixing |
| Fermentation weight | Keeping fruit submerged |
| Cheesecloth or breathable cloth | Covers jar while allowing airflow |
| Rubber band | Secures cloth |
| Fine-mesh strainer | Removes fruit |
| Clean bottles | Final storage |
| Funnel | Easier bottling |
Avoid reactive metal containers for long acidic fermentation.
Glass is the easiest choice.
Step-by-Step Instructions
Step 1: Clean the Equipment
Wash the jar, utensils, cutting board, and knife thoroughly.
Rinse well.
Good cleanliness helps beneficial fermentation organisms dominate instead of unwanted contamination.
You do not need to make the environment surgically sterile, but dirty equipment increases the risk of spoilage.
Step 2: Wash the Apples
Rinse the apples thoroughly under clean running water.
Remove dirt, leaves, and debris.
Trim away bruised areas that are beginning to rot.
Discard any apple with visible mold.
Step 3: Chop the Apples
Cut the apples into roughly 1-inch pieces.
You do not need perfectly uniform cubes.
Smaller pieces expose more fruit surface to the water and microbes.
The peels can remain on.
Step 4: Fill the Jar
Place the chopped apples into the jar.
Fill it approximately halfway to two-thirds full.
Do not pack the apples tightly.
The liquid needs room to circulate.
Step 5: Prepare the Sugar Water
Dissolve the sugar in some of the water.
Warm water can help dissolve it, but allow the mixture to cool before pouring it over the apples.
Pour the sugar water into the jar.
Add additional water until the apples are completely covered.
Leave several inches of headspace at the top.
Step 6: Keep the Apples Submerged
This is one of the most important steps.
Pieces floating above the liquid are much more likely to grow unwanted mold.
Use a clean fermentation weight or another food-safe method to keep the fruit beneath the liquid.
Check the jar regularly.
If pieces rise above the surface, push them back down with a clean utensil.
First Fermentation: Turning Sugar into Alcohol
Cover the jar with breathable cloth rather than sealing it airtight.
Secure the cloth with a rubber band.
Place the jar somewhere out of direct sunlight at moderate room temperature.
During the first several days, you may notice:
- Small bubbles
- Cloudiness
- A fruity or yeasty aroma
- Foam near the surface
These are common signs that fermentation is active.
Stir gently with a clean utensil once daily if fruit is floating.
Keep the apples beneath the liquid as much as possible.
How Long Does the First Fermentation Take?
Usually around 1–2 weeks, but fermentation does not follow an exact calendar.
Temperature makes a big difference.
A warm kitchen usually speeds fermentation.
A cooler room slows it.
When vigorous bubbling has decreased and the liquid smells fermented rather than simply like sweet apples, it is usually time to remove the fruit.
Step 7: Strain Out the Apples
Place a fine-mesh strainer over a clean bowl or another jar.
Pour the fermented mixture through it.
Remove all fruit pieces.
Do not leave old apple solids in the liquid during the long vinegar stage because they can deteriorate.
The strained liquid is now ready for the next fermentation.
Second Fermentation: Turning Alcohol into Vinegar
Return the strained liquid to a clean jar.
Cover again with breathable cloth.
Do not seal it tightly at this stage.
Vinegar-making bacteria need oxygen.
Leave the jar in a dark or shaded place at room temperature.
Let it continue fermenting for another 3–6 weeks or longer.
Taste small samples periodically with a clean spoon.
Over time, the liquid should become increasingly tart.
Why Oxygen Matters
The second fermentation is different from the first.
Yeast primarily creates alcohol.
Acetic-acid bacteria then convert alcohol to acetic acid, but they need oxygen to do it effectively.
That is why traditional vinegar fermentation uses a breathable covering rather than an airtight bottle.
If you seal the liquid too early, vinegar development may slow considerably.
What Is the “Mother” of Vinegar?
During fermentation, you may notice a gelatinous or cloudy film forming in the liquid or at the surface.
This can be a vinegar culture often called the mother.
It may look strange if you have never seen it before, but it is not automatically a sign that the vinegar has gone bad.
The mother can appear:
- Cream-colored
- Beige
- Brownish
- Translucent
- Gelatinous
It may float, sink, or break apart.
Do not confuse it with fuzzy mold.
Mother of Vinegar vs. Mold
This distinction is important.
A vinegar mother is generally smooth or gelatinous.
Mold usually appears fuzzy, hairy, powdery, or distinctly colored.
Potential warning colors include:
- Blue
- Green
- Black
- Pink fuzzy patches
If obvious mold develops, the safest choice is to discard the batch rather than trying to scoop only the visible mold away.
When fermentation safety is uncertain, starting over is better than taking a risk.
How to Know When the Vinegar Is Finished
Taste is one of the best indicators for home culinary vinegar.
Once it smells distinctly vinegary and tastes pleasantly acidic rather than alcoholic, it is ready for everyday kitchen use.
Some people prefer a mild vinegar.
Others allow it to ferment longer for a stronger flavor.
The acidity cannot be accurately judged only by taste, however.
That is why homemade vinegar should not automatically be treated as equivalent to commercial 5% vinegar for shelf-stable preservation.
Step 8: Bottle the Vinegar
Once you like the flavor, strain the vinegar again if desired.
Transfer it to clean glass bottles or jars.
At this stage, you can close the bottles.
Label each bottle with:
- Homemade Apple Cider Vinegar
- Date started
- Date bottled
Store in a cool, dark cupboard.
Refrigeration is optional for a properly finished vinegar, but refrigerating can help slow further changes in flavor.
Why Homemade Vinegar Looks Cloudy
Cloudiness is normal in unfiltered fermented vinegar.
Commercial vinegar often looks clear because it may be filtered and pasteurized.
Homemade vinegar can contain:
- Fine apple sediment
- Yeast
- Bacterial cultures
- Mother fragments
These can create a cloudy appearance.
Cloudiness by itself is not necessarily a sign of spoilage.
Can You Use a Starter?
Yes.
Adding a small amount of raw, unfiltered vinegar containing live cultures can help introduce acetic-acid bacteria.
For a large jar, around 1/4 cup is a practical amount.
This does not eliminate the need for good sanitation, oxygen, and proper fermentation.
It simply gives the second fermentation a more reliable microbial starting point.
Why the Jar Should Not Be Filled to the Top
Fermentation can foam.
Fruit can also rise as gas develops.
Leaving headspace reduces the risk of overflowing.
It also allows more oxygen exchange during the vinegar stage.
A completely full jar is harder to manage.
Can You Make Vinegar Without Sugar?
Apple juice already contains natural sugar.
Whole apples also contain sugar.
However, adding a modest amount of sugar to apple-and-water fermentation makes the process more predictable because diluted apples may otherwise provide too little fermentable sugar.
If you are fermenting pressed apple cider rather than diluted chopped apples, extra sugar may not be necessary.
Homemade Apple Vinegar from Apple Juice
Another method is to start with preservative-free apple juice or fresh apple cider.
Avoid products containing preservatives such as potassium sorbate because they are designed to suppress microbial growth.
Pour the juice into a clean jar.
Add a live vinegar starter if desired.
Cover with breathable cloth.
Allow fermentation to proceed until the liquid becomes acidic.
This method can create a stronger apple flavor because no water is needed to cover chopped fruit.
Apple Scrap Vinegar
If you make a lot of apple desserts, save clean peels and cores.
Use approximately:
- 4 cups apple scraps
- 4 cups water
- 1/3 cup sugar
Proceed using the same fermentation method.
Because scraps contain less juice than whole chopped apples, the finished flavor may be lighter.
This is an excellent zero-waste kitchen project.
What Can You Use Homemade Apple Vinegar For?
Once properly fermented, the vinegar can be used in many recipes.
Good culinary uses include:
- Salad dressing
- Marinades
- Coleslaw
- Sauces
- Potato salad
- Bean salad
- Braised vegetables
- Pan sauces
- Refrigerator pickles
- Homemade mustard
- BBQ sauce
Its flavor may vary slightly from batch to batch, which is part of the appeal of homemade fermentation.
Simple Apple Cider Vinegar Dressing
Combine:
- 3 tablespoons homemade apple vinegar
- 6 tablespoons olive oil
- 1 teaspoon Dijon mustard
- 1 teaspoon honey
- Salt
- Black pepper
Whisk until emulsified.
Taste and adjust the vinegar amount according to its acidity.
Because homemade vinegar strength varies, you may need slightly more or less than commercial vinegar.
Honey Mustard Apple Vinegar Dressing
Whisk together:
- 2 tablespoons apple vinegar
- 1 tablespoon Dijon mustard
- 1 tablespoon honey
- 4 tablespoons olive oil
- Black pepper
- Pinch of salt
This dressing works especially well with salads containing:
- Apples
- Pecans
- Walnuts
- Chicken
- Cranberries
- Goat cheese
Apple Cider Vinegar Marinade
Mix:
- 1/4 cup apple vinegar
- 1/3 cup olive oil
- 2 tablespoons honey
- 2 minced garlic cloves
- 1 teaspoon Dijon mustard
- Herbs
- Black pepper
Use for chicken, pork, or vegetables.
Do not reuse raw-meat marinade unless it is boiled appropriately.
Can Homemade Apple Vinegar Be Used for Canning?
This is an important distinction.
Do not substitute homemade vinegar for commercially produced 5% acidity vinegar in recipes intended for shelf-stable home canning unless the acidity has been reliably tested and the recipe specifically allows it.
Homemade vinegar acidity varies.
That may not matter much in a salad dressing, but it matters greatly in preservation recipes where acidity is part of the food-safety system.
Use commercially standardized vinegar for tested canning recipes.
Can You Drink Apple Cider Vinegar?
Apple cider vinegar is acidic.
If you choose to consume it as a beverage ingredient, dilute it substantially.
Straight vinegar can irritate the mouth, throat, stomach, and tooth enamel.
A culinary approach is simpler: use the vinegar in food rather than treating it like medicine.
There is no need to drink large amounts.
Does Apple Cider Vinegar Burn Belly Fat?
No vinegar can selectively melt abdominal fat.
Apple cider vinegar is often promoted online for rapid weight loss, belly-fat removal, detoxification, or appetite control.
Those claims are usually much stronger than the evidence supports.
Using vinegar in a balanced diet is fine.
But meaningful fat loss still depends mainly on long-term energy balance, diet quality, physical activity, sleep, and individual health factors.
Does Apple Cider Vinegar Detox the Body?
It should not be described as a special detox cure.
Your liver, kidneys, digestive system, lungs, and other organs already process and eliminate waste continuously.
Apple vinegar can be a flavorful fermented food ingredient.
It does not need exaggerated detox claims to be useful in the kitchen.
Does Apple Cider Vinegar Cure Diabetes?
No.
People with diabetes should not replace medication, glucose monitoring, medical care, or an appropriate eating plan with vinegar.
Vinegar has been studied in relation to glucose responses, but that is very different from curing diabetes.
People taking glucose-lowering medication should be particularly careful with concentrated dietary interventions and discuss them with their healthcare professional.
Safety Considerations
Apple vinegar is highly acidic once fermentation is successful.
Large or concentrated amounts can irritate the digestive tract.
Frequent direct contact can also contribute to tooth enamel erosion.
People taking certain medications, particularly those affecting blood sugar or potassium balance, may need additional caution.
If you have chronic kidney disease, significant gastrointestinal problems, diabetes treated with medication, or another relevant medical condition, discuss regular medicinal-style vinegar intake with your healthcare professional.
Using small amounts as a normal food ingredient is different from taking large doses as a supplement.
Make-Ahead Instructions
This recipe is entirely based on preparation ahead.
Once the first fermentation begins, simply maintain the jar and check it regularly.
Keep fruit submerged during the apple stage.
After straining, give the vinegar access to oxygen during the acetic-acid stage.
Label the jar so you know when fermentation began.
Taste periodically after several weeks rather than relying on one exact finishing date.
Storage
Once the vinegar has developed the acidity and flavor you like, bottle it in clean containers.
Store away from heat and direct sunlight.
Sediment may settle on the bottom over time.
Additional mother may also form.
These changes can occur naturally in raw unfiltered vinegar.
If the liquid develops obvious fuzzy mold, unusual putrid odors, or other clear signs of spoilage, discard it.
Common Mistakes and How to Avoid Them
Using Moldy Apples
Do not ferment rotten or moldy fruit.
Letting Fruit Float Above the Liquid
Keep the apple pieces submerged during the fruit fermentation.
Using a Fully Airtight Lid During Vinegar Formation
Acetic-acid bacteria need oxygen.
Use breathable cloth during the active vinegar stage.
Forgetting to Strain the Apples
Remove fruit solids after the first fermentation rather than leaving them in for months.
Assuming Cloudiness Means Spoilage
Raw vinegar is naturally cloudy.
Confusing a Vinegar Mother with Mold
Mother is generally smooth or gelatinous; mold is usually fuzzy.
Using Homemade Vinegar for Shelf-Stable Canning
Do not do this unless its acidity has been reliably verified.
Expecting Vinegar in Three Days
Real fermentation takes time.
Adding Excessive Sugar
More sugar does not automatically create better vinegar.
Frequently Asked Questions
What is homemade apple cider vinegar?
It is vinegar produced by fermenting apple sugars into alcohol and then allowing acetic-acid bacteria to convert that alcohol into acetic acid.
How long does it take?
Usually several weeks. Around 4–8 weeks is a common range, although individual batches vary.
Can I make it with apple scraps?
Yes.
Can I use whole apples?
Yes. Whole chopped apples usually provide a richer flavor.
Should I peel the apples?
No.
Can I use bruised apples?
Minor bruising can be trimmed away, but do not use moldy or rotten fruit.
Do I need sugar?
If using diluted chopped apples, sugar helps provide enough fermentable material.
Can I use honey?
Honey can ferment, but it changes the fermentation environment and flavor. Sugar is easier for a predictable beginner recipe.
Do I need yeast?
Wild yeast may begin fermentation naturally, but fermentation can vary.
Can I add raw apple cider vinegar?
Yes. A small amount containing live cultures can help seed the vinegar stage.
Should the jar be airtight?
Not during the active vinegar stage.
Why is the mixture bubbling?
Bubbles can indicate yeast fermentation.
Why is it cloudy?
Raw fermented vinegar naturally contains yeast, bacteria, and sediment.
What is the vinegar mother?
It is a cellulose-rich culture associated with acetic-acid bacteria.
Is the mother safe?
A normal vinegar mother is not the same as mold.
What does mold look like?
Mold is generally fuzzy, hairy, or powdery and may appear blue, green, black, or other distinct colors.
What should I do if mold appears?
Discard the batch.
How do I know when it is ready?
The liquid should smell and taste distinctly vinegary rather than alcoholic.
Can I use it for salad dressing?
Yes.
Can I use it for marinades?
Yes.
Can I make refrigerator pickles with it?
It can be used for flavor, but because homemade acidity varies, use caution with preservation claims and keep such preparations refrigerated.
Can I use it for shelf-stable canning?
Not unless the acidity has been properly verified. Standard tested canning recipes normally require commercial vinegar of known acidity.
Can I drink it straight?
It is better not to. Vinegar should be diluted.
Does it burn belly fat?
No.
Does it detox the liver?
It should not be relied upon as a liver detox treatment.
Can it replace diabetes medicine?
No.
How should it be stored?
Keep finished vinegar in clean bottles away from heat and sunlight.
How long does it last?
Properly fermented vinegar is naturally acidic and can keep a long time, though homemade batches vary. Discard any batch showing clear signs of spoilage.
Final Thoughts
Making Homemade Apple Cider Vinegar is one of the most satisfying ways to transform apples into a useful fermented kitchen ingredient.
The process begins with clean chopped apples, water, and sugar. Yeast first converts the sugar into alcohol. After the fruit is removed, acetic-acid bacteria use oxygen to gradually transform that alcohol into tart vinegar.
Patience is more important than complicated equipment.
Keep the apples submerged, maintain clean equipment, give the vinegar stage access to air, watch carefully for mold, and let flavor rather than an exact calendar tell you when the vinegar is mature.
Once finished, use it in salad dressings, marinades, sauces, and other everyday recipes.
Just remember that homemade vinegar varies in acidity, so it should not replace standardized commercial vinegar in tested shelf-stable canning recipes.
Handled carefully, a basket of fresh or slightly imperfect apples can become bottles of flavorful homemade vinegar instead of going to waste.